So you heard of the brand new Airflow 2.0 and want to run it on your own machine to give it a go.
Sadly, the getting started isn’t nearly ready for an integration environment as it neglects most of the interesting components and features like multiple workers to distribute tasks.
Don’t worry I have you covered.
In this article I will show you a dummy project with:
- Everything running under docker compose using official Airflow docker image
- Separate container for Airflow scheduler and webserver
- An Postgresql backend for Airflow operation that allow to run task in parallel
- Multiple workers run with Celery
- Flower as Celery’s GUI
- Home-made dags instead of Airflow examples

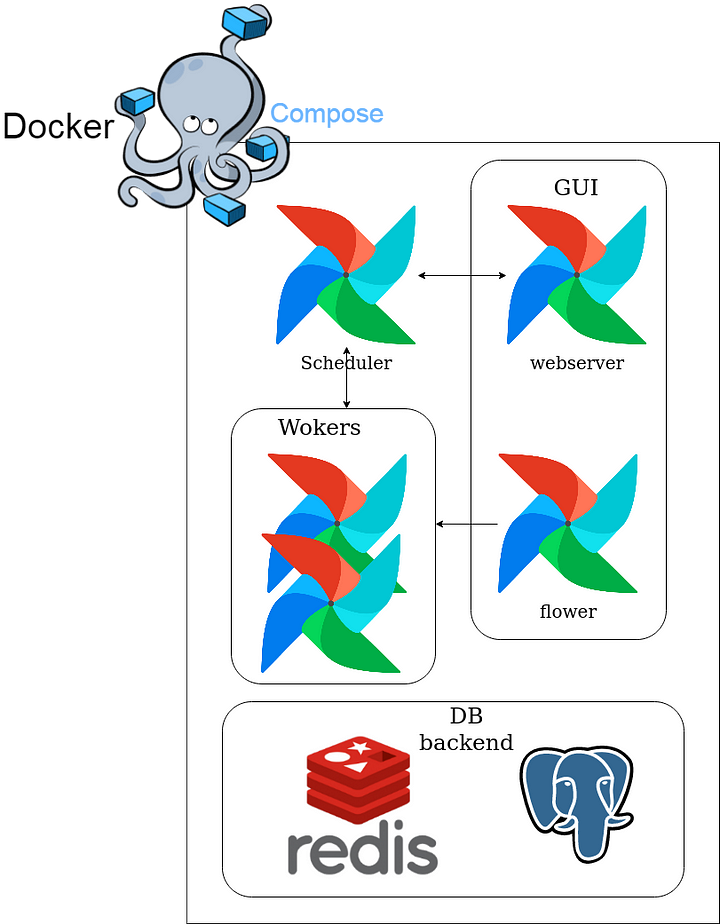
Here you can see the full infra we want to create from our project repository https://github.com/knil-sama/itm.
git clone git@github.com:knil-sama/itm.git
cd itm
docker-compose up
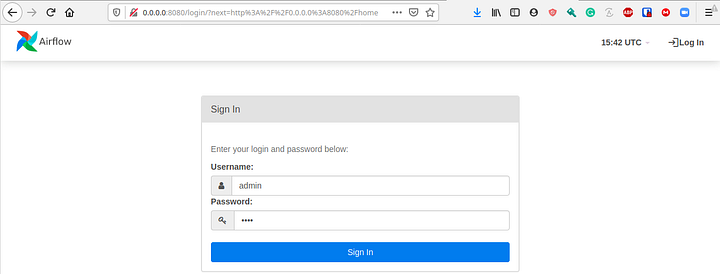
You can then acces the Airflow GUI
First thing you want to do once everything is up and running, is to login into airflow webserver with user “admin” and password “test”.

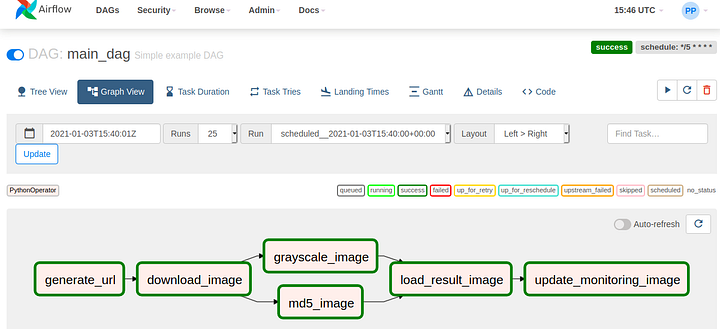
Then we can activate our dag “main_dag” that will then be picked up by our scheduler every 5 min (or you can click on the play icon to trigger it by hand).

Here for more details regarding DAG run.

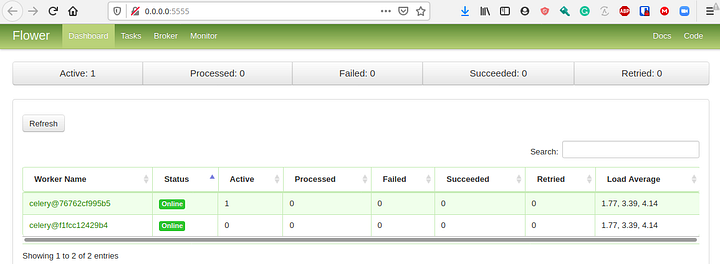
Another interface you can interact with is the Flower one that provides a monitoring of your celery workers.

If we take a look at the docker-compose we can see the dependencies between each machines and starting order
webserver -> scheduler -> woker then flower
Each machine started with a dedicated airflow command, except the webserver where we do two operations before starting it:
- Initializing postgresql backend db (to simplify the demo here we don’t keep persistent storage and reinitialize each run in order to avoid conflict when doing init on an already existing backend)
- Create an user admin because airflow don’t provide one by default only roles, you can also allow user to self register
Another thing to consider is that we share DAGs among the following machines so we rely on xcom to rely simple variable and store image in mongodb, because we don’t have a shared filesystem
To avoid duplicated configuration we create single env file env_airflow.env
Here some details of the configuration that are needed
# Don’t load sample dags
AIRFLOW__CORE__LOAD_DEFAULT_CONNECTIONS=False
# Use the same folder used when mapping volume
AIRFLOW__CORE__DAGS_FOLDER=/usr/local/airflow/dags
# Setup access to postgresql backend
AIRFLOW__CORE__SQL_ALCHEMY_CONN=postgres+psycopg2://airflow:airflow@postgres:5432/airflow
# Used to secure variable in airflow backend
AIRFLOW__CORE__FERNET_KEY=81HqDtbqAywKSOumSha3BhWNOdQ26slT6K0YaZeZyPs=
# Use celery as a broker to distribute task
AIRFLOW__CORE__EXECUTOR=CeleryExecutor
# Key value backend for celery
AIRFLOW__CELERY__BROKER_URL=redis://redis:6379/0
# Postgresql backend for celery (not the same uri than for other connection)
AIRFLOW__CELERY__RESULT_BACKEND=db+postgresql://airflow:airflow@postgres:5432/airflow
# Metadata backend
AIRFLOW_CONN_METADATA_DB=postgres+psycopg2://airflow:airflow@postgres:5432/airflow
AIRFLOW_VAR__METADATA_DB_SCHEMA=airflow
# Setup heartbeat to check scheduler is alive
AIRFLOW__SCHEDULER__SCHEDULER_HEARTBEAT_SEC=10
After that you are all set to experiment yourself with Airflow